Browsing Category

Photo Tips & Tricks

iPhoneography, Photo Tips & Tricks

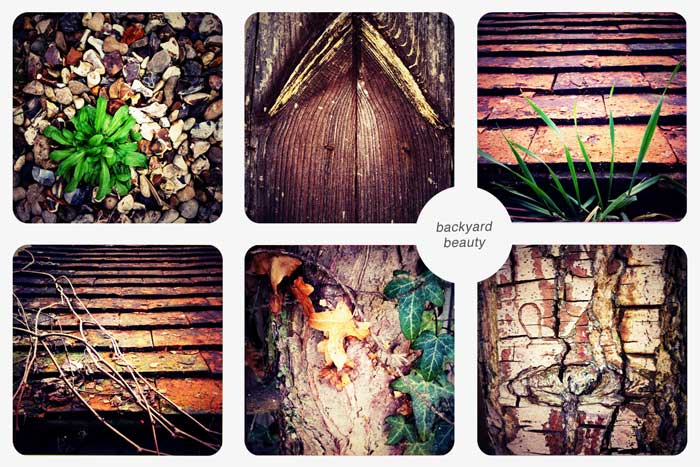
Finding the Beauty in Your Own Backyard

“In photography, the smallest thing can be a great subject. The little, human detail can become a Leitmotiv.”   – Henri Cartier-Bresson

As a photographer, I find there are days when I really struggle to be inspired.  I try to shoot everyday as I feel it’s one of the best ways to improve.  But some days I just don’t have the mojo.  Or, don’t have the time.

When I travel and get out and about, it’s easy.  I find I can “see” photographs everywhere.  I’m always inspired to capture all the places I go, documenting those moments and memories forever.  And, I’m sure I annoy my friends and family plenty as I do.

But most days, I’m not traveling to exotic places.  Most days, I’m at home in the kitchen working, doing laundry, and playing games with the little man.  And, it’s easy to become complacent about the mundane things that surround you everyday.

When I have one of these days where I’m at home and I’m lacking inspiration, I sometimes do the “100 Paces” exercise.  I just walk out the door, walk 100 paces in any direction, and photograph whatever I see.

And I’m usually rewarded with something interesting.  There is beauty even in the smallest corners of my backyard.

How do you find beauty in your everyday surroundings?  Why not try the “100 Paces” exercise?  

iPhone Processing:  Shot and filtered with the Lomora2 App
The Cloud
iPhoneography, Photo Tips & Tricks

Why iCloud is My New Best Friend

I take a lot of photos on my iPhone.  Just last week, I had to clean them all out because I had in fact run out of storage space on my iPhone.  (Hint, hint to anyone that wants to get me a new 64GB 4S).

But the thing about taking so many photos on the iPhone that never really worked well for me was backing them up. This required plugging the iPhone into my laptop with the USB cable, synching it with iTunes, and importing photos into iPhoto.  Well, frankly, I didn’t do this very much.  I don’t know why.  I just never really thought about it much and it was a pain.

In my previous post about the importance of backing up your home computer, I didn’t mention mobile devices.  But, really, it’s just as important to back these up, especially if you’re a prolific mobile photo taker.  And I’ll tell you why.

Last summer while on holiday in America, I lost my iPhone.  Gone.  Vanished.  One minute I had it, the next I didn’t. Apple has this great app called Find My iPhone, which allows you to locate a missing device. But here’s the thing. Find My iPhone is super for locating your phone (or iPad even) under normal circumstances.  But if you’re travelling abroad and have turned off data roaming (which one should to avoid a massive bill when you get home), well, Find My iPhone will not find your iPhone.

The net of all this is that because I didn’t backup my iPhone every day, I lost stuff, photos in particular.  Now lucky for me, I had synched my iPhone with iTunes and iPhoto before I left for my trip.  Also lucky for me, I had been regularly sharing photos on Instagram.  So, I didn’t lose all the photos on my phone, just a week or two worth.

Enter iCloud, my new best friend.  If you setup iCloud and then turn on Photo Stream, your most recent photos AUTOMATICALLY get synced and copied to all your devices.  This means that I can take a photo on my iPhone and then as soon as I’m connected to Wi-Fi, it uploads to iCloud and then automatically appears on my other devices, the iPad2 and MacBook.  On my home network, I have literally just taken a photo on my iPhone and it’s appeared on my Mac in less than 30 seconds.  No more wires.  No more worries.

iCloud syncs other stuff as well.  Documents, iTunes, Calendar, Contacts, Apps AND it automatically backups my iPhone (and iPad) settings to iCloud.  This stuff is just brilliant.  Yes, I’ve had the Apple Kool-Aid and it tastes good.

So if you have an iPhone and you takes loads of photos with it, setup iCloud and turn on Photo Stream.  One day when you drop your phone in the toilet (yep, I’ve done that too) you’ll be glad you did.

B is for Backup
Photo Tips & Tricks

Are You Backing Up Your Home Computer? Today’s Public Service Announcement

Last week a photographer friend of mine got a virus on her laptop which rendered her machine mostly unusable.  I think one of the first things out of my mouth when she told me this was “you have backups, right?”  Which thankfully, she did.  Now she makes a living off the things stored on her home computer, photos in particular.  So it makes sense that she’d go through the extra effort protect her work.  After all you can’t really go back to a bride and say well, I got this virus and well, all your wedding photos are gone.  Not good.

But good backups of home computers shouldn’t be reserved for those that make money off work they create and save at home.  Good home backups are for everyone.  We all create documents (resumes, letters, school homework), create spreadsheets (budgets, taxes, etc.), buy music, and record videos.

And photos, we take thousands and thousands of photos.  But with the explosion of digital photography, we rarely print our photos anymore.  I’m guilty of this.  Last year alone, I took about 5000 photos but I have very few prints.  Now, most of those photos certainly aren’t print worthy.  But lots of them are memories I’d certainly be pretty upset about losing and, without prints, losing the digital copy means losing the photo.

Despite the personal and sentimental value of our growing digital libraries, very few of us back them up to make sure that if something bad happens we’d be able to get it all back.  If I took a survey of my friends and family, I know that less than half of them would complete backups and of the half that do, they’re not regular.  It’s something they do when they remember.  (Trust me, I’ve done tech support for enough of them to know.)  The people I know that have good backups at home are all geeks like me.  It’s understandably difficult for the average home user to navigate the technical jargon and figure out what they need and what works.

Well, before I became a stay at home mom, this is what I did.  I advised Fortune 500 companies from various industries (finance, government, media, manufacturing, energy) on how they carry out backup and disaster recovery strategies.  These are organizations that literally cannot afford to lose data or for it to become unavailable.  Otherwise, they can lose millions of dollars a day, face bad press, lawsuits, or run afoul of regulators.  Because of what’s at risk, these companies spend millions implementing systems that make sure their data is available 24/7 365 days a year and that they can recover instantly from any failure.

Now most home users don’t need backup systems as advanced as those used by large enterprises.  And, they certainly don’t need to spend millions of dollars.  But there are certain fundamentals of these systems that any home user can implement.  And it’s all pretty simple.

Simplistically, you should have:

Multiple Local Copies Taken Automatically

Every good backup system will have local copies of the important data.  By local, I mean physically attached to your computer or accessible on your home network.

These kinds of backups answer the question, “What if I f**k something up?”

This is the most common thing people need to recover from.  You’ve just deleted or saved a file and instantly wish you had a time machine to take you back just one minute.  You’d prevent yourself from doing the stupid thing you just did.  Having a local copy protects you against your own stupidity and allows you to recover individual files quickly and easily.

External hard drives (USB, FireWire) are ideal for this purpose and you can find these in all shapes and sizes pretty cheaply these days.  Alternatively, if you’ve got a family of four where mom, dad, and the two teenagers all have computers, you can do this really fancy and get a hard drive that’s attached to your wireless network that everyone backs up to wirelessly.  We’ve all got laptops in the house so this is what we do. It’s just the easiest way to have backups run automatically all the time without having to worry about plugging in a USB hard drive.  If all you’ve got is one desktop computer, this is overkill, just plug a USB drive into your one computer.

Others might feel differently, but I say leave the external hard drive plugged into your computer all the time.  This gives you the advantage of being able to leverage an automated process where backups occur regularly without your intervention.  And, let’s be honest, anything that requires you to remember to do something means it’s less likely to happen.

In addition to having a place to store your copies, you’ll need something to make the copies, a backup application.  Apple OSX and Windows 7 both come standard with backup software that will do this.  Windows 7 has the aptly named “Backup and Restore” and OSX has the brilliant Time Machine (reason alone to go Mac).  Most external hard drives also now come bundled with backup software that will often automate the process.

Me, I’m an Apple person so I’m happy with my Time Machine and don’t bother with any other software.  Windows users are likely to feel differently and want to take advantage of software that comes with their external hard drive as these typically require little to no configuration.

Once you have a place to store the copies and something to make the copies automatically, you want to make sure that you have multiple copies that span various time frames.  Sometimes when you realize that you screwed up you don’t want the file from yesterday, you want the one from last week.  Making and keeping multiple copies over time allows for this flexibility.  Apple’s Time Machine, for example, automatically takes hourly backups of the things that have changed on my computer.  So worst case, I’d lose an hour of work.  But Time Machine also keeps all daily backups for a month and weekly backups for all months.  It will keep as many as it can until the storage is full and then start deleting the oldest ones to make room for the new.  This is a pretty solid backup and retention schedule.

But what if my computer is stolen or corrupted by a virus?

Bad things can happen to computers.  Bad things that make them completely unusable.  Bad things that make us want to throw them across the room.  These bad things might mean that you need to replace or recreate your entire machine, not just recover individual files.  When these things happen, it’s not just your documents and photos you need to worry about but also your software, things like Microsoft Office, Photoshop, and Email.

Fundamentally, having a backup system in place to an external hard drive as described above will solve this.  If you’ve done regular backups to an external drive, all your data, including software and applications, will be there for you to recover.  You may have to re-install some applications in the process of rebuilding your computer, but there’s nothing unique about Microsoft Office that you can’t recover by simply reinstalling it.  It’s just time-consuming.

More tech savvy people will have programs that create system images of their computers.  These allow them to recover their entire computer at once without reinstalling anything.  While this is a good practice, I don’t think it’s necessary for the  average home user provided you’re not pirating all your software and you keep the DVDs for any major software that you’ve purchased.  Reinstalling a bit of software isn’t the worst thing anyone has ever had to do.  The most important thing is ensuring that you protect the stuff you can’t recreate (think photos).

Remote Copies Taken Automatically

All good backup systems will also have remote or “off-site” copies of important data.  By remote I mean not in your house.

This kind of backup answers the question “What if my house burns down?”  I know what you’re saying, this won’t happen to me.  But you know what?  I’ve known someone whose house burnt down and they lost everything.  You just never know.  Maybe you get robbed and they steal not only your computer but also your external hard drive.  If all you’ve done is backup your stuff to an external hard drive which is also in your house, well, you’re shit out of luck.

This one is dead easy these days.  If you haven’t heard about the Cloud, learn about the Cloud, it will be your best friend.  Basically, the idea is that you copy your data over the Internet to a company that provides backups as a service.  All you need for Cloud backups is a broadband Internet connection and to install some software from your chosen provider.  That’s pretty much it.

Then, automatically, all your important files will get copied over the Internet to somewhere that is not in your house.  The two best I’ve seen are Backblaze and MozyHome.  Both will give you a free trial so see what works best for your specific needs.  There are others as well.  My beloved Apple has iCloud which is great for a few specific purposes, especially if you have an iPhone and iPad, but it’s not a full backup solution, yet.

Now I’ve taken a very simple view of doing backups of your home computer.  You can get really advanced and fancy with a backup strategy for your house but most people don’t need this.  If you’re someone whose livelihood relies on the contents of your home computer, then yes, you might want to be a little more sophisticated.

But as a starting point, just do this:

Keep at least two copies of everything digital you value, one in your house and one not in your house.  Update these copies daily and automatically.  And if you’re not already doing this, start now, today.


iPhoneography, Photo Tips & Tricks

Making Sense of My iPhone Camera Bag: An Application Addict Comes Clean

Hello.  My name is Katherine and I am a recovering addict, iPhone photography application addict that is.  At last count I had close to 80.  Seriously, I have a problem.  There is no way I could ever use all of these in my daily photography.  But ever since I first starting taking photos with my iPhone and discovered the world of photography apps, I’ve felt compelled to check them all out.  Each might be just the thing to turn my average looking iPhone photo into something magical.

Well, this year I’ve resolved to clean house .  My iPhone has quickly become my go to camera and these days it’s getting a lot more action than my Nikon DSLR.  And, it’s completely replaced my point-and-shoot.  It’s not that I don’t still love taking photos with my Nikon, it’s just that my iPhone is ubiquitous, it’s like an appendage.  And you can’t argue with photographer Chase Jarvis when he says “the best camera is the one that’s with you.”

But the dizzying array of apps that I have on my iPhone is starting to get in the way.  They’re taking up space, they’re cluttering my screen, they’re making my iPhone a more fussy camera than it should be.  For me, the iPhone is about being able to capture the spontaneous moments of life.  I like making artistic creations as well, but you can’t apply a funky vintage filter to a photo that doesn’t exist in the first place.  I’ve also had a few friends with new iPhones ask me to suggest some apps that they try.  So I figured what better reason to identify what I really use and put a list together.

How am I going to clean house?  I’ve taken a step back and thought about what my requirements really are (yep, this is the former IT consultant in me coming out).  What are the functions I really want to have and use regularly? Here’s what I’ve boiled it down to.

Shooting

You can’t take pictures without a basic camera app and the built-in Camera app that comes standard with the iPhone is pretty darn good.  And, now with IOS5, I love that I can just double-click the Home button and have instant access to the Camera app from the Lock Screen.  Great when speed is of the essence.  The new ability to use the Volume+ button to snap pictures also makes the iPhone feel even more “camera-like.”

But, sometimes I want something a little more robust or creative and these are the camera apps that fill in some of the gaps for me.

  • Camera+ and ProCamera – These are both camera replacement apps that have features you’d want in a camera that the built-in Camera app doesn’t have.  They include a timer, burst/continuous mode, stabilizer/anti-shake mode, separate focus and exposure lock, and support the Volume+ shutter function.  As a bonus they both include some basic editing tools and filters.
  • Hipstamatic – Hipstamatic shoots in square format and simulates retro photos that would have come out of a toy camera.  There are so many permutations of lens / film combinations that the results are unique and I’m never quite sure what I’m going to get.  The only drawback for me is that choosing the lenses and film can be a bit cumbersome.
  • Lomora2 – I gravitate toward LOMO style and effects, unusual saturated colors and vignettes, but I’m not a film kind of girl anymore so I simulate them.  There are plenty of apps that have LOMO filters you can apply after the fact but shooting with the Lomora2 app has given me better results.

Serenity

Basic Editing

There are plenty of apps that try to give you Photoshop-like tools to edit the photos on your iPhone.  But if I wanted to spend all my time doing masking and layers in Photoshop, well, I’d use Photoshop.  In my mind, that is clearly reserved for photos from my DSLR.

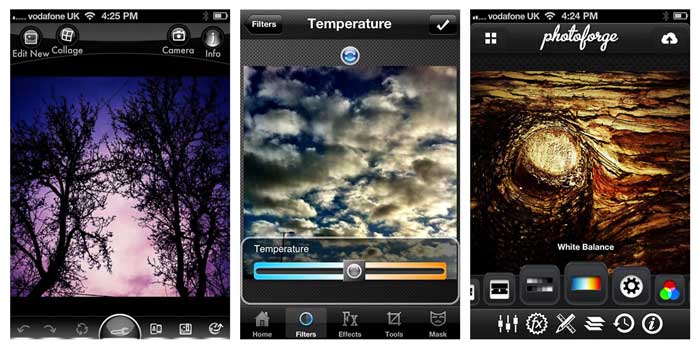
But, there are some basic editing functions that I still find necessary.  Things like cropping, rotating, adjusting white balance, and fixing exposure.  In looking at the apps I had with these functions, I narrowed it down to those with iPad versions as well.  With the release of IOS5 and iCloud, my photos are now seamlessly available on my iPad2 where I can edit them with a little more screen real estate.

  • Photoforge2 and Photogene2 were the two apps that stood out for me.  There is overlap in the tools they have but there is enough unique about each of them that I use them both.  Photoforge2 has better filters but Photogene2 has better retouching tools.
  • PhotoWizard also got high marks from me and has a particularly good set of retouching tools and filters.  I want it to have an iPad version though.
Basic iPhone Editing Apps

Creative Editing

This is where you can go crazy mad with apps that perform every kind of photo editing gimmick imaginable.  And, this is where I had the most weeding out to complete.  The apps I’ve narrowed it down to have a variety of vintage, lo-fi, color, and black and white effects that reflect my style and vision.

  • PhotoToaster – I’ve used PhotoToaster quite a bit for a number of the color filters and lighting adjustment that it has.  I also like how it allows me to combine effects.
  • PictureShow – This has great set of filters for creating various lo-fi effects such as light leak and vignettes.  It also has a groovy shuffle button where you can just leave everything to chance.
  • TiltShift – Tilt shift is a method of using selective focus and color to make a scene appear as if it is in miniature.  A number of apps include this feature but I’ve found the TiltShift app to be the most flexible.  I made lots of these on my train travels in London.
  • Scratchcam – As its name might suggest, Scratchcam has a dizzying array of scratches and textures that can be overlayed on an image.
  • Pixlr-o-matic – FREE!  Plus I like the selection of light effects (bokeh) and textures.
  • PicFrame  – PicFrame is useful to have because it allows you to combine multiple photos into frames and collages.
  • Percolator – This one is just fun.  It can take a photo and turn it into a mosaic or painting.  There are loads of different adjustments so the possibilities are endless.
Fiery Grass

Sharing

Finally, after I’ve created all these photos, I share them.  I share them with family and friends and cast of strangers I’m connected to only through various social networks.  But, that’s part of what photography is all about to me in the first place, sharing a bit of how I see the world around me.

  • Instagram – FREE!  No matter what app I may have used to create my photos, they all get shared out through Instagram.  Instagram allows me to share photos simultaneously to all the places I post them, Facebook, Twitter, Tumblr, Email, and Flickr.  Instagram is also a great social network for photographers in its own right.  For those really wanting to keep things simple, Instagram is possibly all you need as you can shoot, apply filters, and share all with this one app.
  • FlickrStackr – FlickrStackr I use for managing photos in Flickr, adding them to sets, groups, adding tags, etc.  Basically, this just helps keep my Flickr stream a little more organized.

So there.  I’ve cleaned up my iPhone and reduced the number of photo apps by about 80%.  Now that I’ve freed up all that space, I’ll just have to fill it up with more photos.

If you have other favorites in your iPhone camera bag please share in the comments.