
Good thing it’s got a little fortress surrounding it.
Good thing it’s got a little fortress surrounding it.
There is a lot of debate in photography circles about whether the iPhone (or any mobile phone) is a “legitimate” camera. I say emphatically, YES. Just look at the work of award-winning photojournalists Ben Lowy and Damon Winter who both captured emotional images of war. Or wedding photographer Jerry Ghionis. Who wouldn’t want wedding photos like that? Ghionis is spot on when he says:
“Photography is more about the craft of lighting, posing, composition and story telling, etc. than which camera you use.”
Super fancy camera gear may make a difference in certain situations, say high-speed sports action. But at the end of the day, it’s still the person behind the camera making artistic decisions about how to shoot and the aesthetics they use to convey a message. The iPhone is just another tool in the photographer’s arsenal, whether they’re an amateur or a professional photojournalist. And iPhones are typically the cameras we always have with us and ones that make it easy to capture life’s moments without getting in the way.
Much of the debate around mobile photography is around apps and filters applied to photos. About whether these apps take away from the legitimacy of an image. But I think this is no different from adjustments people make in Photoshop. Model in a glossy magazine? Someone took her photo with a really expensive camera, but she’s not real, even though we’re expected to believe she is. Just like Photoshop, iPhone apps can be used to enhance an image, maybe improve it, maybe give it a certain mood. For example, by changing an image to black and white.
But what many iPhoneographers are also doing is using apps to create an image, turning a photo into something completely different like abstract art. And while this may not be the right approach for photojournalism, I think this is just as valid an art form as oil on canvas. Spend a few minutes on iPhoneArt to see what I mean.
For me, I feel like my iPhone photography has come full circle. I went mad with apps in the early days feeling like I had this new cool toy and I had to check out all the fun things I could do with it. But I’ve recently gone back to basics and am processing my images a lot less, trying to take a more minimalist approach to apps and letting the images speak for themselves. As a bonus, this is also saving me loads of time.
These days I’m shooting mostly with Hipstamatic making conscious choices about the style I want before I shoot and leaving the image as is. If you’ve tried Hipstamatic and been scared away by the lens and film choices (like I was originally) try following @hipstaroll or @hipstachallenge to get some ideas of combinations to try.
What do you think? Are iPhones legitimate cameras? Or have apps become a crutch to compensate for average photos?
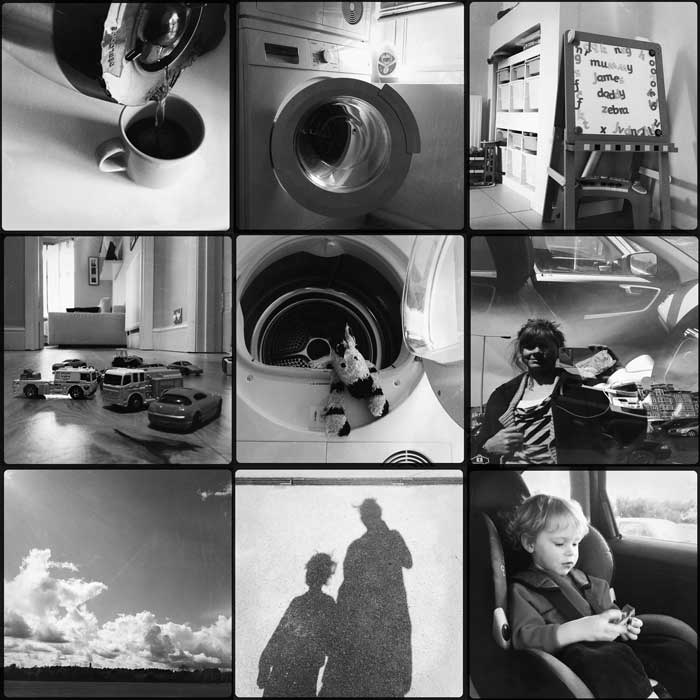
Yesterday I took part in the ADAY.org global photo challenge about using “the power of photography to create, share and inspire perspectives on daily life – today and tomorrow.” People from all over the globe captured moments of their life yesterday and these images will all eventually be part of an online gallery and book with the goal of documenting what life was like around the world on this one day.
I captured everything with my iPhone and Hipstamatic. Photographer Star Rush inspired me to use black and white as she says, there is an “unrealness” to black and white. “This is not life. It’s a photo of it, a recollection.”
In all, I took about 300 photos and had to narrow that down to 10 to submit for the project. The hardest part! To see the 10 photos I contributed, go to my ADAY profile page.
But here’s more of a glimpse into our day yesterday. We did lots of pretty average, everyday things like the school run, the laundry, running errands in Oxford, having a coffee in Starbucks, and spending time at the playground. The weather didn’t disappoint by giving us the full spectrum of English weather. Rain, sun, wind, hail, and thunderstorms.
And I managed to capture proof of all our lives yesterday.


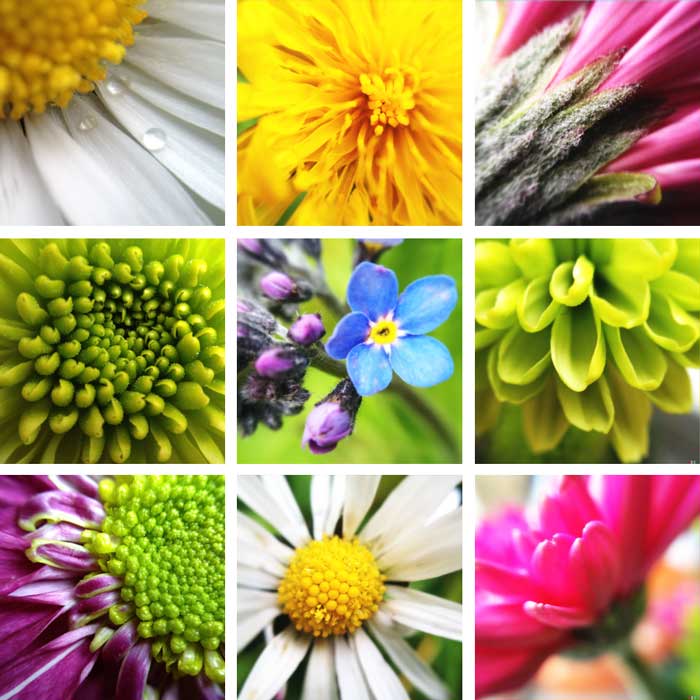
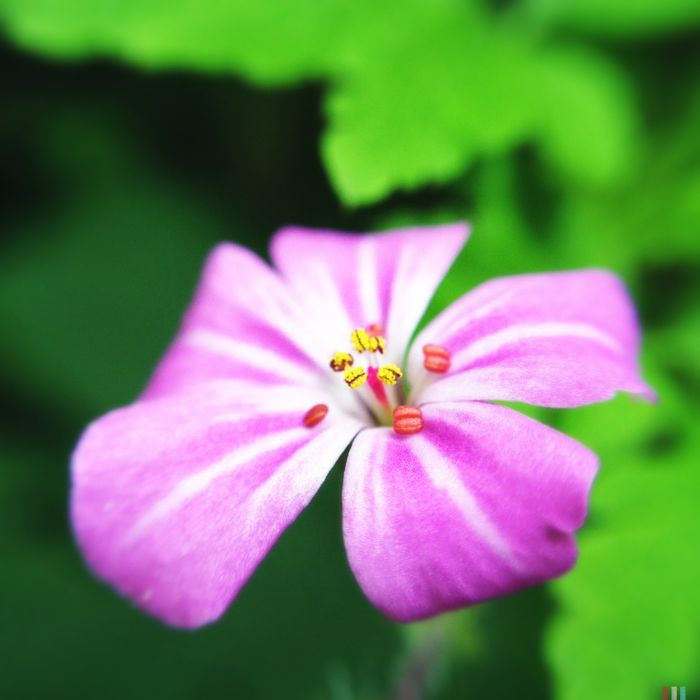
Macro photography produces some amazingly gorgeous images and it’s always been one of my favorite styles of photography. The way these close up photographs capture the intricate details of the world around us, the details that are easily overlooked, is astounding. But to create really stunning macro images you do need the right camera gear, something I haven’t decided to invest in yet. It really just hasn’t been super high on my priority list at this time in my life.
But, enter my trusty iPhone. Using some birthday gift vouchers (Thanks!), I treated myself to an Olloclip. What’s a Olloclip you ask? Well, it’s this ingenious little gadget with fish-eye, wide-angle, and macro lenses that you clip onto your iPhone. Yes, I’m taking my iPhone photography to the next level and attaching an external lens to my phone. I know that sounds crazy.
So far though, I’m loving this thing. My one and only gripe is having to take the case off my phone to attach it but that’s really not a big deal. I captured all the images above with the Olloclip macro lens attached and they are all straight out of camera and unedited. I shot some of them with the native Camera app and some with Hipstamatic (Loftus lens, Blanko Freedom 13 film).
Things I’ve learned about shooting with this macro lens so far:
So, an iPhone with the Olloclip won’t be the best camera gear for getting macro shots of dangerous living animals. But, for plenty of other subjects it’s a great choice for experimenting with macro photography on your iPhone. I haven’t yet tried the fish-eye or wide-angle lenses. If you’re into iPhone photography and have a iPhone 4 or 4s, this is definitely an accessory to consider.
And, as a bonus, it will give you an excuse to treat yourself to some flowers.
The big news on the social networking scene this past week was Facebook’s $1 billion purchase of Instagram, a mobile photo sharing app used by 40 million people, me included. Lots of people are up in arms over this and think Facebook is going to kill Instagram. There will certainly be changes over time, some for the bad but maybe some for the good. Facebook isn’t the devil people, it’s just a social network, not life or death.
But this isn’t a post about the future of Instagram, plenty of other people have covered that extensively. This is about continuing to take lots of iPhone photos and using Instagram as a platform to collect and share them.
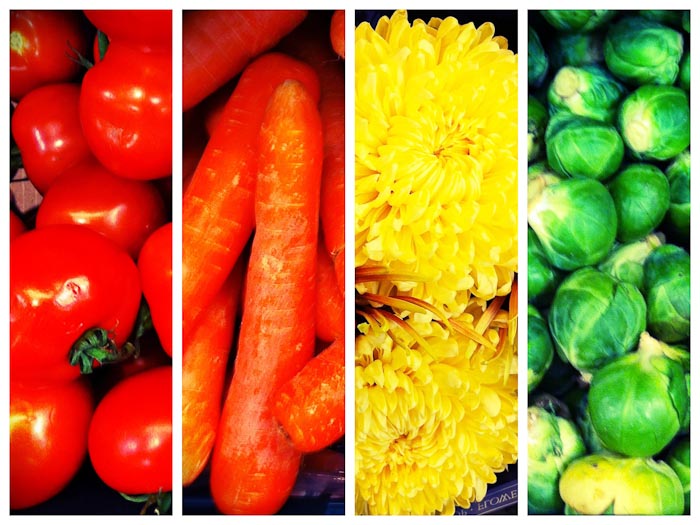
Sharing individual photos with Instagram has become a major part of how I tell the stories of my everyday life. But sometimes, pulling together multiple photos into a collage is an even more powerful way of telling a story. You can group a collection of photos with a similar theme or share the who, what, why, and where of a special event as a single “storyboard.” Check out Susannah Conway’s beautiful site for an excellent example of this. She hasn’t said a word but just by looking at this series of images as a whole, you feel like you know what she’s been up to.
There are a number of tools that I’ve used to create collages with my iPhone photos. And, most of these work just as well with non-iPhone photos.
Diptic and PicFrame are both great apps for creating photo collages directly on your iPhone or iPad. They have very similar templates, work basically the same way, and cost the same. So for me, this is pretty much a toss-up. You can’t go wrong with either. Both allow you to export high-resolution photos which can then be shared out through Instagram. I created the image above using PicFrame.
With Instagram, you can easily share your photos to Flickr. Once the photos are in Flickr, you can use a program like Mosaic Maker from Big Huge Labs to create a basic grid collage out of individual photos, photosets, or tags. I used this last year to create monthly summary collages of my 365 project. I don’t really use this much anymore though because all my photos aren’t in Flickr.
First, if you’re taking lots of photos on your iPhone you’re using iCloud to back them all up, right? Good. This means they’ll already be on your Mac in iPhoto ready to export or do whatever you want with them.
I use Adobe Lightroom to organize and manage all my photos. It’s also where I do 90% of my editing. One of the things you can do with Lightroom is leverage the Print module to create collages because you can “print” to JPEG. This excellent tutorial by Jay Watson shows you how to create a diptych with the Lightroom Print module. You can easily extrapolate this to create whatever type of collage you want. And, you can save any templates you create for future use. For example, I used Jay’s method to create the collage I used in this post.
Photoshop though is the clear winner for me if you want to get really creative with photo collages. It might be a little more work but the results are worth it as you have complete control over the design. To make life A LOT easier, I highly recommend checking out the photo layouts by Pugly Pixel. She offers some photo layouts as freebies and others for a very nominal fee. And her web site is loaded with tutorials on how to use them with Photoshop. Everything I know about designing with Photoshop, I’ve learned from her. The collage of Instagram photos that I used in this post was created using a Pugly Pixel Photoshop template.
Finally, if you don’t have Photoshop or Lightroom but have a Mac OS X 10.7 or later, you can get the wonderful PicFrame (same app as for the iPhone) from the App Store dirt cheap.
Creating collages not only helps to tell a story, but, as a bonus, it also saves you LOADS of time when you’re trying to include lots of photos in a blog post. Inserting a set of images as a single photo in a blog post is so much less painful than trying to insert and align numerous images. Much less painful.
Thanks to Nanette who asked a question that inspired me to write this.